Decks are a great addition to a home, it allows you to appreciate your outdoor space more and makes for a wonderful area to relax with family or entertain guests. Even if you know nothing about construction, creating a deck is a project you can take on yourself.Even more, choosing the right paint for your deck is another crucial task as you need a quality product that will keep it protected for a longer period. With the right information and guide, you are only a step away from your dream deck. Here are some tips to make the process more cost-effective and help you build a high-quality deck:
Do Your Research
The research will guide you every step of the way, there are so many resources available to you online and there is no excuse to slack on it. There are a ton of articles that will help you understand the process of construction as a starting point. Once you’ve learned the basics you can then proceed to research about your materials. From here you can find out how much your deck will probably cost and what helpful alternative materials and methods you can apply to your project.
For example, if your home may be located in a bushfire-prone area, then using timber for your deck wouldn’t be a good idea due to the combustibility. Instead, you could use a timber composite product, which is comprised of PCV, timber dust and glue. Don’t worry it looks just like regular timber, plus it’s fade-free, slip-resistant, and easy to install.
Obtain Permits
Next thing you’ll have to check before proceeding with construction is checking if your local council has any requirements you would need to be approved for your deck. Usually, a deck with a floor level higher than 900mm off the natural ground would require council approval. Your council will also tell you if there are any areas in your home that would restrict development.
It helps to do some visual research and look at your neighbour’s decks and perhaps ask them some questions about theirs. They could also have some tips to share about retrieving said requirement for your local council. Analyse what you would need and list it down so you don’t get overwhelmed with paperwork.
Find the Best Space
Now, figure out where exactly you wish to place it and what type of orientation it would have. The best place to put it is of course where there is plenty of space and no obstructions. There must be no plumbing or electrical in this area. If you position your deck on the wrong site, the worst-case scenario is that it would be barely used.
Think about your lifestyle, what would make you want to use your deck more? How would the deck enhance your home? Analyse what spaces in your home you enjoy spending your daytime in. For example, if it’s the kitchen or family area then choose a site easily accessible to that.
Next is orientation, you have to consider that it would most likely work best for all seasons if it were situated in the north to north/east side of your house. This allows you to get good morning sun since it rises in the east to the afternoon since it sets on the west. If you place your deck on the south or west side of your home, you are prone to extreme temperatures and this might increase the temperature of your home by transferring heat into it.
Another thing to remember is you are not allowed to build your deck any closer than 1 metre from a side boundary fence, keep in mind privacy retention. Consider your neighbours view as well as yours. You can always talk to your neighbours about these types of issues and adjust by adding a screen to your deck.
Draw Up an Initial Design
Now that you know where you want to place your deck, you can start by drawing an initial design attached to the copy of your house plan. Take note of all windows and doors leading towards the deck and include all external wall lengths and internal space dimensions of rooms that would have an important relationship to the deck.
Designing a deck could be difficult and you can start by looking at ones you like online, you could also consult a draftsperson to do it for you. From there, you will have to consult an engineer to specify the size of the materials required for the job. Don’t worry, this isn’t going to burn a hole in your wallet since you are simply discussing a basic deck.
Prepare Your Site
Once everything is set, it’s time to prepare the site. Make sure to clear the site of bushes, trees, roots, structures and grass to ease the construction process.
If there are trees or plants over 3 metres high, you must check with your local council if these must be preserved. If it needs to stay, don’t worry, a lot of decks look great around trees.
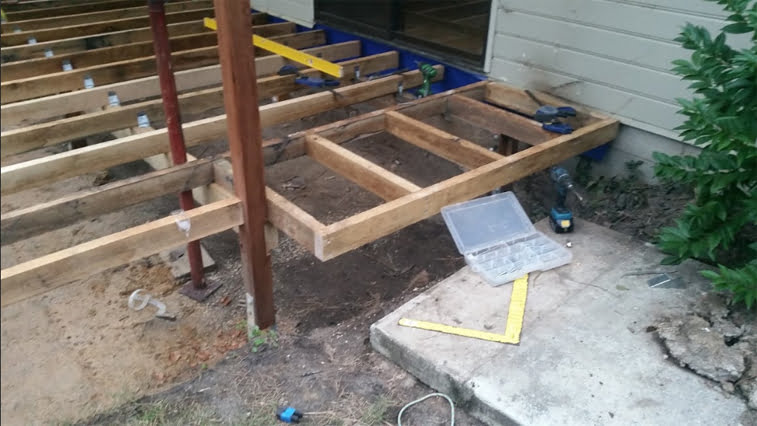
Construction
Make sure you have all the tools needed and the correct materials for the job. This helps prevent things like wood rot, premature corrosion and termite damage.
It’s best to consult with a professional to inspect the deck and its connection between entrances to ensure that waterproofing issues are covered. If not, you could risk having a less durable deck.
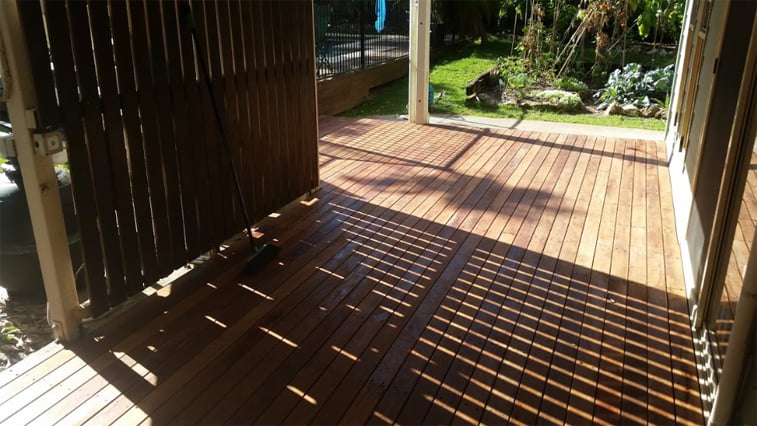
Painting or Sealing
Now that the deck is constructed, you will have to coat it to protect it from fungus, or the weather. Our friends at https://www.marriottconstructions.com.au/ highly recommend an oil-based coating to enhance the appearance of the material, extend its life and stop it from splitting.
From there, you will need to recoat every year or two depending on how the deck has aged. While there are many types of finishes on the market, reaching out to an expert can help you choose the right one.
Another option would be to paint your deck because this offers a longer protection period of up to 10 years.
Certification
Once you’ve finished constructing your deck, it needs to be certified before it can be used. A great person to go to would be the engineer who you previously consulted with for the design.